My first working homebrew was a kit: RC2014
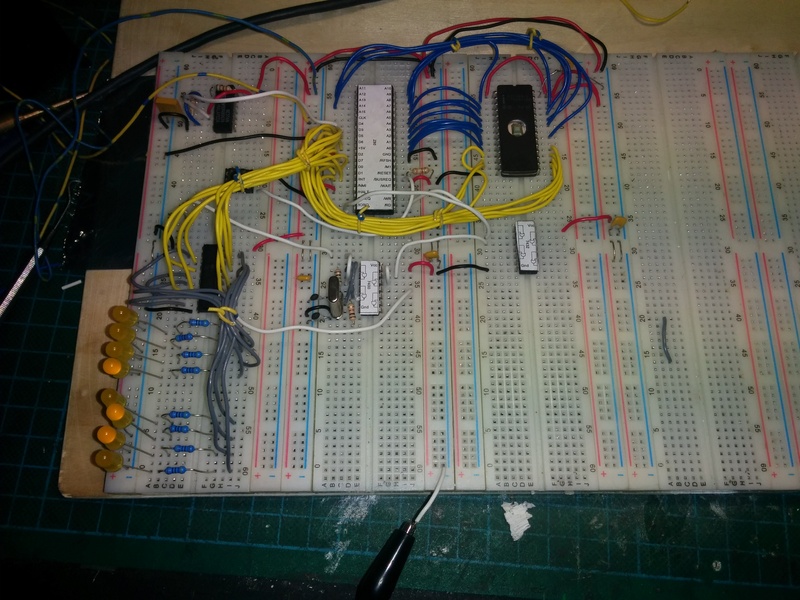
After having solved the mystery of counterfeit parts, I felt ready to start attacking my master plan of building my own Z80 based computer. I wired up a CPU test circuit and used with great success. I then wired up a simple system on a set of cheap breadboards, consisting of the CPU, a ROM chip and a slow clock generator. With LEDs on the address bus, I punched up some simple assembly that NOP'ed for a while, did a JMP, NOP'ed some more, and then JMP'ed back to start. This was assembled using TASM under Dosbox, and loaded into the ROM using my Minipro programmer. When I applied power to the circuit, it started ticking along, and did just what I expected it to do!
Success! With great spirit, I next wired up a far more "complex" circuit. I added a few support logic gates, a 74LS138 4-to-8 decoder and a 74LS373 8-bit latch, and moved the LEDs from the address bus to the outputs of the latch. With the added components, I had a kind-of 8-bit digital output. With a simple counter code typed and assembled, I had partial success. The circuit and code worked. And then sometimes it didn't. And sometimes when it didn't work, it would start working after some time.
With the bad experiences from fake chips, I started suspecting that my cheap breadboards were causing problems. So I moved the circuit over to one of my "known good" breadboards, part of an old digital trainer device. Now the circuit and code worked most of the time, but still sometimes not. I was getting frustrated. I tore down my wiring, checked and verified my circuit, wired it back up, and got the same result. Was there something that I had completely misunderstood? Was there something very wrong with my method?
Eventually, I decided to stop faffing about. I decided that the best way forward, would be to start building a known good design. With that, I would be able to verify that I am able to pull this off, and I would be able to use it to test and verify what I was designing from scratch. So, enter the RC2014!
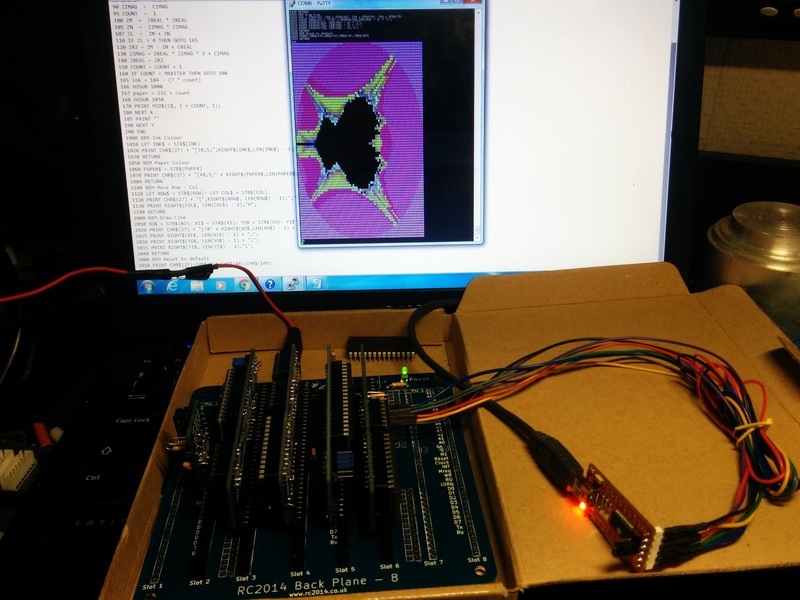
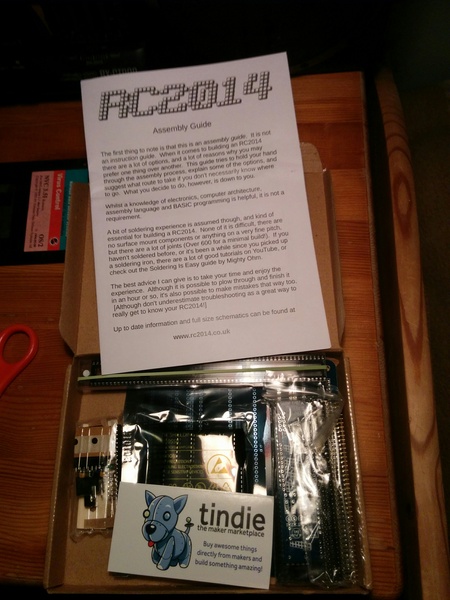
It was now late december 2015, perfect timing for a "christmas gift to self" kind of a purchase. In my research for options and ideas, I had looked at Spencer Owen's RC2014 several times. It is a dead simple design, and cheap as well. Perfect match. Off to Tindie I went, my order placed on saturday the 19. december. I was very impressed when the kit arrived in my mailbox on the 23rd! I brought the kit with my on my Christmas holiday, and by the 27th it was completed. I connected up a TTL-USB adapter, and powered the thing up. To much joy, the kit sprung to life! Grant Searle's BASIC monitor greeted me with Microsoft BASIC for Nascom (modified by Searle and Owen).
This was back when the only RC2014 kit available was the "Classic" version. My kit was the "Full monty" set, with all components, and the 8-slot backplane. The kit was genuinely well put together. The PCB's are simple, but cleanly presented. Components were well packaged, and sorted. The instructions were simple, but clear and concise. The overall packaging was small! As for ease-of-build, there are many connections to solder, and get right in a kit of this type, so I would not recommend it to a beginner. But even with the simple pen-style soldering iron I keep at mum's home, I was able to complete the job cleanly in a reasonable amount of time. So I'd call it an intermediate kit easily. I can happily recommend Spencer's kits, and the new, updated versions of RC2014 kits look nice indeed. I'm tempted to buy another one, to be honest 🙂
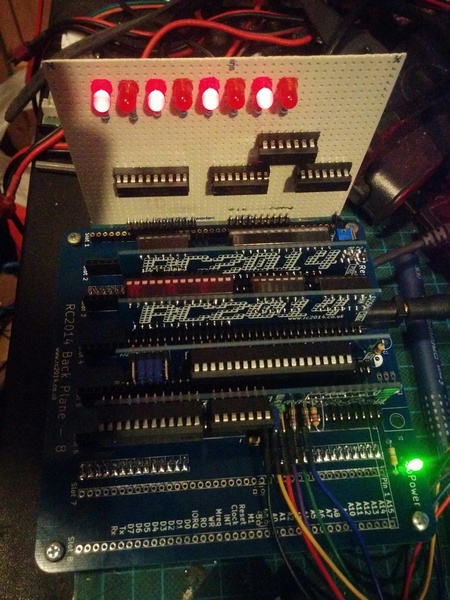
I now had my first working Z80 based homebrew computer! And with an 8-slot backplane, I had 3 slots available, as the original kit uses 5 slots: CPU, ROM, RAM, Serial I/O and Clock generator. With a simple bus format using Single row connectors, it should be easy to make expansion cards. I dug out a perf-board, added the needed right-angle single-row header pins, and soldered up the exact circuit I had tried on my breadboard. I plugged it into the backplane, and tested it using OUT statements in BASIC. It worked! Another great success, but at the same time somewhat of a mystery to me. Why did it not work on breadboard, when it worked fine in a more complex system? I decided to test removing the RAM and Serial cards, and load my test-ROM onto the ROM card. Suddenly, the I/O board was behaving erratically again. Thanks to RC2014, I now had proof that my hardware was working, and my software was bad. The kit had actually already accomplished what I wanted: verify that I could assemble a working system from someone else's design, and verify that I could design working hardware myself.
All of this made me make a change of plans. Instead of going back to the breadboard, I decided to try to implement Grant Searle's Minimal CP/M system using home-built cards for the RC2014 backplane, before proceeding with my own design. The process of this is the topic of a post of it's own.
I have since (much later, really) dug out the wonky test-code, and corrected my mistakes. I can't remember what exactly was wrong, but I seem to remember it was embarrassing. I have not tried wiring it up on breadboard again, as all my Z80 CPUs have been busy running on other systems 🙂
This post is part of a series documenting my journey in making my own homebrew computer, the posts can be found on this link.
Fake electronic components, a hazard of online shopping

This adventure started with a plan, and a bit of drafted design, to make a homebrew computer based on a Z80 CPU, and related components. But, I didn't actually have a Z80 chip yet! So, being cheap, I got the idea that going to eBay to find the needed components would be a great idea. Boy was I wrong.
After looking over my ideas, I searched eBay, and came up with a list of orders for central parts: A pair of Z80C0020 CPUs for $3.35, a Z84C4208 SIO/2 for $7.90, and five HM628128LP RAM chips for $6.0. All items from sellers providing free international shipping! The money left my account in december of '15.
As with all orders that include free international shipping, delivery time was a few weeks, so the project was put on a back-burner. When the parts arrived in early february, I was already well into other projects. So I gave them a quick look, everything seemed in order, and I packed them in my parts bin to wait. For nearly a full year.
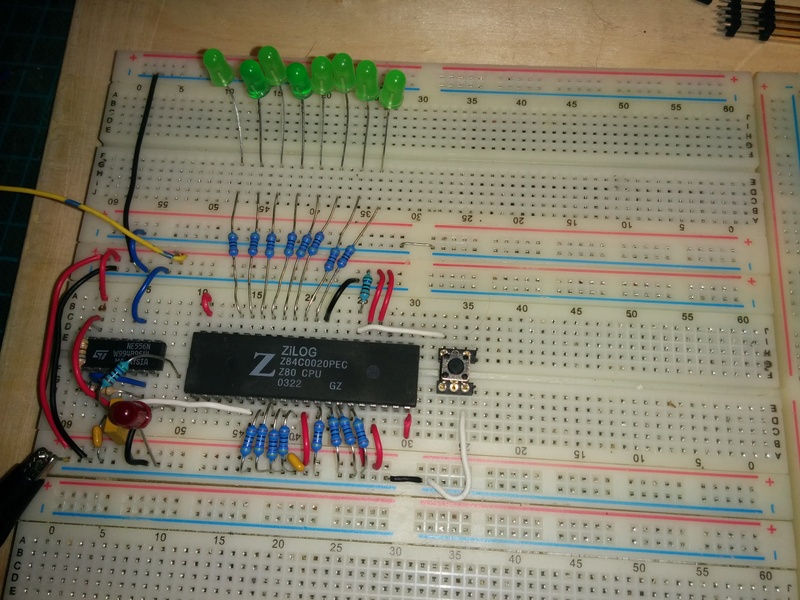
When winter came around in 2016 and Christmas was approaching, it was time to start a winter-project. The Z80 homebrew project was resurrected, the components were dug out from the parts bin, and the first test-circuit was wired up on a set of breadboards purchased at bottom-price sometime during summer. A test-setup for this CPU is extremely simple. In the Z80/8080 instruction sets, the opcode 0x00, 0b00000000 is a NOP, so simply making all data-bus pins be tied to ground makes the CPU NOP its way through all 65536 addresses! So: behold the test-setup..
I checked, and checked again that I had the pinouts and connections right, made sure my bench power-supply was set to 4.99Volts, and examined my documentation to see that I should expect about 5-30mA current, LEDs not included. Next I connected my VCC from the power-supply to the setup, and immediately ripped the wired back off. The powersupply screamed 800mA at me! What could be causing my simple test circuit to draw 10-20 times as much current than I expected?
My first suspect was of course my wiring. So I checked that again. Pin-for-pin it was correct. The second suspect was the cheap breadboards, and the doublesided tape that stuck them to a wooden board. To eliminate those, I moved the circuit to a "known good" set of breadboards, part of an electronics trainer. After again checking the wiring, power was applied, and again the circuit pulled 6-800mA, and none of the LEDs lit up.
Next suspect was the Z80 chip itself. It could easily have been zapped by static during shipping, so I was happy I had ordered two, and slapped the second one on. This time, the power-supply reported a draw of 10mA, with a dim glow from one of the LEDs. Weird. I pondered for a moment, and just a moment long enough... Suddenly the current consumption rose to some high value I can't remember, and the famous, magical blue smoke appeared out of the Z80. Two for two...
As I now didn't have a CPU to use in the project, I decided to look up what the Z80 would cost from the reputable sources. After seeing that Mouser, DigiKey and RS Online all had the Z84C0010PEG in stock, I selected to order two from DigiKey for a total of $12, plus just about $18 for shipping. So, close to 10 times more than I paid for the two duds from eBay. But unlike the first two that took around 25 days to arrive and were non-functional, DigiKey had the parts in my mailbox some 50 hours after ordering, transported from the UK to Norway. And when I inserted one of them in the test circuit, it worked flawlessly, and pulled just under 28mA.
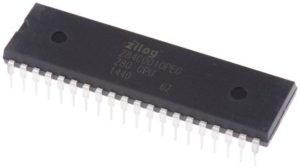
Z84C0010PEG, genuine
With a sneaking suspicion that less than $10 for the SIO/2 delivered might be a very optimistic price, I decided to test that one with only the supply voltage applied to the VCC/GND pins. I was most certainly correct. Just under an amp was being pulled, and the chip got very hot indeed (but did not release any magical smoke). Was I surprised? Well, the first time, with the CPU I was, even if the price had been very low indeed. But when the SIO/2 turned out to be a dud as well, I was not surprised.
The cheapskate in me had received a lesson: Always buy active semiconductor components from a proper, reputable source!
There's two types of semiconductor fakery going on: Clones of actual components, and outright fake duds. In the first group, you have things like the FTDI232/PL2303 fakes, where functional (but possibly crippled) semiconductor copies or clones are being manufactured and sold, as being the real deal. Some of these clones actually make their way into the mainstream supply chain of the official parts, sometimes because the original manufacturer "moonlights" poor-quality cheaper editions of the original.
The second type relies on online trade, cheapskates like me, or naive buyers. In this group, a seller looking to make a quick buck targets one or more reasonably popular but usually somewhat obscure components. They gets a hold of a bunch of very cheap components in the same package (like the DIP40 of a Z80). The cheap component will typically be a random IC that sells very cheaply, factory defects that can be picked from scrap heaps, or even old parts pulled from "recycling". With the package, they then clear away any markings on the package, and silk-print the markings of their "target". This convincing lookalike is then put up for sale, usually with a price placed around 1/2 of the "per one" price of sellers like DigiKey or Mouser.

Generic picture of Fake Z80
So, how does one spot the fake? Most of the time, simply looking at the price including shipping should be enough. If a component costs $6 plus shipping from Mouser, and sells for $2 including free international shipping, just walk away. It's going to be a fake. Also, if a seller is using the same stock, but not manufacturer, photo of the component as every other seller with the same device at the same price you're probably in muddy waters. Unfortunately it's not always that simple. Often times, the price is probable, and the photo looks convincing. And when you get the component in hand, the relabeling has been so well done you don't spot it. It really is a buyer beware situation.
With all these fake components going for cheap on eBay, does that mean that it is never OK to buy semiconductors there? I think it sometimes is OK. If the part has a realistic price, a plausible description, maybe even a unique photo taken by the seller, the probability of a good part goes up. As long as the seller is not located in China. Look for European or American sellers, Japan is typically also a "good source". In my experience, buying things from China is usually a decent experience EXCEPT for semiconductor parts. I've once received an IC, transistor or FET from China that was what I ordered...
Considering that a "realistic price" is typically the same as the price for a new component (or even higher) bought from DigiKey or Mouser, when would these "rules" for eBay-ing semiconductors apply? The answer to this is very simple: Non-active, obsolete parts. Sometimes you need an old part that's no longer in production. Trying to find a "good" seller of these is sometimes impossible, and if possible they are usually priced waaay expensive. So the best option for getting a decent price is going to eBay.
One example of mine of this is the AY-3-8910/YM2149. I have wanted to experiment with one of the "olde-time" 8-bit audio-chips, and looking over the various soundchip options I decided I wanted to try out the General Instruments AY-3-8910 or one of it's variants. Unfortunately the all of the AY-3-89xx chips, in GI or Microchip name, as well as the YM2149F have been out of production for several years. The only option of getting a hold of one is to get NOS or Pulled parts. I located a not-eBay seller (unfortunately I've lost the link) of genuine NOS AY-3-8912 chips. Unfortunately, paying $50 per chip was not something I felt like doing for a bit of experimentation. My limit was at $25. Going to eBay instead I located a chap in Germany that wanted $5 plus $1 shipping for one YM2149F. I also located a pair of sellers in China, one that wanted $8, free shipping for a Microchip AY-3-8910 and one that wanted $7 plus $2 shipping for an AY-3-8912. I ordered those three. When they arrived, I found out that the 8910 one was clearly a fake, while the 8912 and the 2149 both worked just fine!
There are a LOT of fake semiconductors on eBay and AliExpress. Generally, cheap, free-shipping components sold on these sites from mainland China are guaranteed to be fake. If the component you are looking for is still in active production, buy it from a proper electronics distributor like RS Components, DigiKey or Mouser. If the component you are looking for is obsolete/out of production, take care, research probable prices, and be critical to sellers location.
This post is part of a series documenting my journey in making my own homebrew computer, the posts can be found on this link.
Scribbling ideas for a homebrew computer design
This is part two of a series, documenting my journey in making my own homebrew computer (previous post here). As the title suggests, it looks at my process of selecting a design. But first, as I am a computer history nerd, a little computer history ...
The world of computing as we know it wasn't in my opinion started by the big behemoths of the early computing age. Yes, they created the field of computing, and through steady capability increase combined with reduced sizes made the systems we have today possible. But it required the invention of the microprocessor to make the idea of personal computing a realistic idea. Before that, it seemed computers was something for big businesses, universities and research institutes. But with the creation of chips, originally designed for flight computers in jetfighters and for calculators at accountant desks, hobbyists started playing with the idea of creating a computer of their own! Early on, the homebrew computer systems was the way to get a computer in a private home. Early examples of commercial personal computers, like the Altair 8800 and Processor Technology Sol-20 were in reality business-backed homebrew systems. In fact, the first of these commercial systems were shipped as blank PCBs and bags of components. Even the famous Apple I computer is an example of this. It is this enabling of computers in the average Joe's hands that enabled the explosion of computing that has lead to the technology enabling we have today.
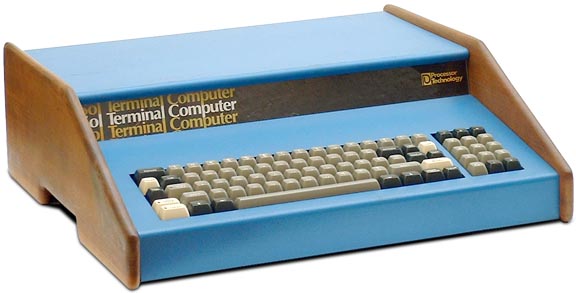
Sol Terminal Computer / Sol-20
So, to design thoughts and ideas. I wanted to create a computer that fits in the era of homebrew. This means to me, a fairly low-end system, designed by an individual or a small group of people, using time-period components, to be built in the home. If my design is able to be produced as a kit, that fits right in with the "standard" of the day. System designs were prototyped in basements and cellars, to later be sold as kits for other people to brew at home, and modify and expand. It was natural for me to select an 8-bit platform as my target, after all the 8-bit "revolution" was at the core of homebrew. As mentioned, I wanted to use time-period components, but I also wanted to be able to create my system without having to resort to "New-old-stock" or cannibalizing of parts to get a hold of parts that are no longer manufactured. This put some hefty restrictions on my options, and also meant I had to allow myself to use a few bits of "modern" technology.
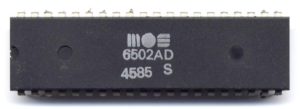
This brings me directly to the choice of a CPU for my system. I talked about how the 6502 was the first CPU that I got to know in-depth in my previous post. Unfortunately (or fortunately, take a pick), I early on decided that the 6502 would not be the CPU for my system. While the CPU is still available, in a CMOS-ified version with added instructions (W65C02S6TPG-14), it would require some supporting components that are no longer available (other than NOS) to make a full computer that I would be happy with. With that realization, I started looking at what other microprocessors were used in significant number of designs. Candidates seemed to be: RCA CDP1802, Motorola 6800, Intel 8088, Intel 8086 and Zilog Z80. Of those, the only one that has an active, still in production version that's not a derivation is the Z80. As a bonus for choosing that one, it comes in a bread- and perf-board friendly 40Pin DIP, and has significantly simpler interfacing than the other options, by having full address- and databuses, simple single-phase clock and a trivial voltage-supply requirement of simply 5Volt. The Z80 was also designed to be relatively compatible with the 8080, so a lot of existing software runs on both CPUs.
Landing on the Z80 gave me additional things to explore. Being a retrocomputing-nerd, I have for a long time wanted a system that could run CP/M. Control Program for Microcomputers is a very significant part of Personal Computing History, and a great number of systems, both commercial and homebrew, either had CP/M ported, or were designed specifically for it. With the Altair and IMSAI computers kick-starting a form of standardization with the S100 bus, CP/M became more or less the standard operating system for general personal computers, and thus had a majority share of the system software marked. It was only beat by the multitudes of different ROM BASIC versions summed up. CP/M was designed for select 8-bit Intel 8080 development systems, but due to its design it was easily ported to compatible machines, and with the compatibility of the Z80, quite a lot of systems were designed with just that CPU. While exploring what it would take to let me design a CP/M friendly system, I discovered Grant Searle's brilliant set of designs. On taking in the content of his site, I was first impressed by the amount and quality of work mr Searle has done to make his systems available and understandable. Second, I was blown away by how simple a CP/M system could be. So my path was early on set; I would take inspiration from those designs, and get CP/M running!
With a path staked, my plan became to try implementing the "Fully functional Z80 CP/M machine using only 9 chips" from Grant Searle on a breadboard or perfboard before proceeding to attempt a design of my own, to make sure that my understanding of the complexities involved was sane. However, I allowed myself to start sketching ideas for what I wanted to accomplish with my own design while waiting for parts. The journey of trying to get the first system operational will be documented in separate articles, this one is about the sketching...
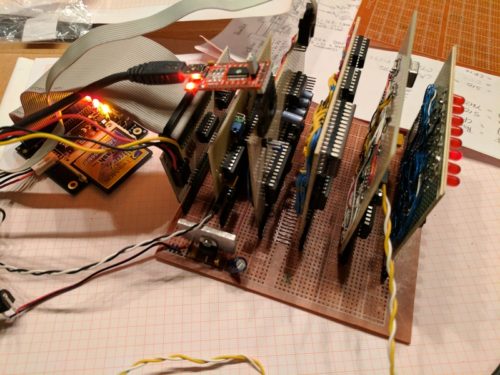
My homebrew hybrid prototype of Grant Searle and Spencer Owens's designs
One of my early design choices was between simplicity or expandability. I had looked at the designs in the Retrobrew Computers community, and generally thought they were trying to be somewhat more "modern" than what I was trying to achieve. I wanted something that was a bit simpler, but at the same time I thought that having the option of extending the system would be great. This led to quite a few nights reading up on various bus architectures from the homebrew era, thinking about using one of the "standard" options like S100[1][2] or STD80[1][2]. One big issue with using one of the full-featured old standard bus designs was that it would require a lot more complexity than I wanted. So I decided not to go down that route, and rather go for a more raw CPU signal extension bus.
While examining what I would need to put on such an expansion interface, I became aware of Spencer Owen's RC2014. His first version of the RC2014 was basically Grant Searle's simple Z80 BASIC system, split into multiple cards, one for each major component, connected to each other on a simple 40-pin perfboard-friendly bus-approach. I really liked the concept, but saw a few challenges in it. It used single-row 2.54mm spaced header pins, and omitted a few signals that I knew would be needed later. From experience, I felt that using double-row connectors would lead to more solid mechanical properties, as well as making the bus mechanically smaller. Spencer's bus does not "fit" on a 100mm wide PCB, a real issue as prices for PCBs (and EDA/CAD if not using KiCAD or EasyEDA) has a definite crossing point at exactly 100mm... A double-row physical layout would also very easily translate into a card-edge implementation if one would like a truly retro feel... There will be a (possibly short) article about the result, with pinout and concept released to the public domain. I call my idea/approach the Z50Bus.
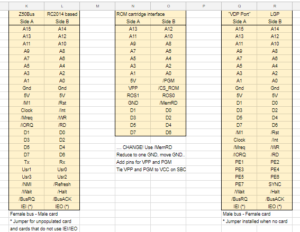
With a bus inspired by RC2014, it would also be possible to take advantage of the many cool designs that Scott M Baker has made. Take a look at http://www.smbaker.com/category/electronics-projects/, he has some really sleek additions and extensions based on the fairly simple RC2014. After seeing what smbaker has been able to do, I was sure that I wanted a simple, yet complete CPU bus, and that way be able to reduce the amount of "onboard" features.
Originally, I really really wanted to have a graphics system as a direct part of my design. Quite a lot of time was spent thinking about using memory-mapped or register/io-space based with their pros and cons, debating using a prefab Video Display Processor like the VIC, VDP or Yamaha V-series, and researching indexed video, colour-register based approaches and planar graphics. After seeing FAP, the FPGA Assisted Processor, I came to the conclusion that using an FPGA would be very similar to the time-period correct ULA, PLA and CPLD approaches that were actually used on Home Computers of the 1979-1985 period, just faster and reconfigurable. Going that route should allow a core hardware design to implement many different graphics subsystems, allowing experimentation.
However, I have chosen to not implement the actual graphics system initially! Most homebrew computers of the early microprocessor age didn't actually have graphics capabilities. Most didn't even support a keyboard. Generally the approach in the early days of homebrew computing was to use a teletype terminal, or a video display terminal. So I decided, if a set of serial ports was enough to get the homebrew computing started, a set of serial ports would be enough to get my system started as well! After all, I had already included an expansion interface, so adding graphics and keyboard I/O later on would simply be just that; an expansion. However, to be able to use memory-mapped video later, I would have to design my memory-map and RAM-interfacing with that in mind. The memory map, and the reasoning behind it is topic for a separate article.
Similar to the decision design for graphics as an expansion, I decided that storage media like floppy disk support is to be an expansion. I intend to create a floppy disk interface, for an actual floppy drive and/or a Lotharek HXC. Also on the roadmap is trying to go real retro, with a cassette interface. But I changed my mind about one form of storage connection. Even if IDE appeared on the market late in the 80's, it is too embarrassingly trivial to implement the 8bit microcomputer compatible mode of IDE. With a sane I/O interface like the Z80 has, all that is required to get working 8-bit mode IDE is a simple address selector, and two OR-gates and a few resistors. Plop a Compact Flash card adapter onto that, and you have an interface to solid state storage "for free". The fact that Grant Searle's CP/M computer uses that exact approach meant that is was an obvious choice for me to include it.
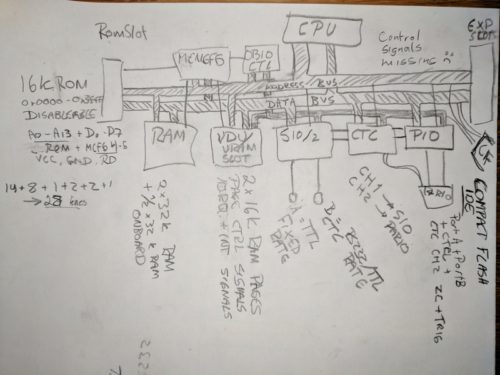
So, my basic design was centered around a Z80 CPU, with a memory map that would work with CP/M and a future graphics expansion, and serial ports for console and communication. To make it possible to have reconfigurable serial port speeds, and also general purpose timer triggered events I figured I needed to include some form of timer controller as an on-board peripheral. It would also be nice if interfacing with the "outside world" was easy, so adding one or more configurable parallel I/O ports made sense. The more I looked at that spec, the more obvious it became that I was more or less describing the standard Zilog "stack" (minus the DMAC): Z80 CPU as the processor, Z80 SIO for serial ports, Z80 CTC for the timer/counters and the Z80 PIO for two parallel ports. From this, it became natural to also design the system to take full advantage of the somewhat special, but cool Z80 Interrupt Mode 2.
IM2 is designed with a very powerful daisy-chain form of interrupt priority and arbitration. In IM2, devices are daisy-chained using their Interrupt Enable In (IEI) and Interrupt Enable Out (IEO) pins, with priority being resolved by their order in the chain. Additionally, interrupt handling is vectored, with the CPU providing upper 8 bits and the interrupting device providing the lower 8 bits of the relevant Interrupt Service Routine to be executed. The whole IM2 system looked very nice to me, so it is a central design element. It introduces challenges when trying to use non-Zilog peripherals unfortunately, but Luke Maurits has given me some ideas to solve that later from his LM-512 Homebrew computer.
As part of my process of building my "learning computers", in the forms of Grant Searle's CP/M computer and Spencer Owen's RC2014, I figured that following an approach close to those made sense. Using 74LS138 for address decoding of on-board peripherals was a safe and natural approach. To enable a memory map for CP/M plus expansion for graphics, I decided to add a "write-only configuration register" by including a 74LS273, placed at the IO address that Grant's monitor ROM uses to enable/disable onboard ROM. I decided that I did not want the complexity of catering for a large memory space, onboard memory was set to 64kbyte onboard RAM, 16k onboard ROM, with a bit of banking for a max configuration of 176k ( 16k*8+48k) RAM and 64k (16k*4) ROM in an expanded system using memory banking via the configuration register. This configuration would allow use of CP/M, expansion with graphics and storage later, but it restricts the system to not be compatible with Fuzix by Alan Cox et al.
To close off a by now rather lengthy post, a summary of design conclusions is in place
- Z80 CPU
- Zilog SIO/2 serial port controller with dual serial ports
- Zilog CTC for four channels of Counter/Timer, 2 of them dedicated to the SIO/2
- Zilog PIO for two Parallel ports
- Expandable system through Z50Bus
- Memory map designed to allow for graphics expansion
- CP/M compatibility
- ROM part of memory from address $0000 disable-able (needed for CP/M and more)
- For fun, a dedicated ROM Cartridge connector
- Z80 Interrupt Mode 2 in the core
- Compatibility with software from Grant Searle (for easy system bring-up)
The last point in the list turned out to be very useful, as it allowed me to tackle a bunch of problems I encountered, without having to also write my own system ROM monitor. It also let me simply load up CP/M onto a CF card and start playing Zork!
Nostaliga: Emma II and the desire to make a computer
This article starts a series, documenting my journey in making my own homebrew computer.
Back in ye olde times of 1994 I attended vocational secondary school as a student of electronics, and during that time, I was introduced to the wonderful lady Emma II. Emma was a "trainer" system based on the MOS Technologies 6502 CPU, in many ways related to the somewhat more commonly known KIM demonstration and development system. This sparked a love for quirky 8-bit computer systems that's still with me today.
http://retro.hansotten.nl/6502-sbc/emma-by-l-j-technical-systems/
http://www.anf.nildram.co.uk/beebcontrol/arms/atlas/emma.html
Using Emma's (fairly flakey) hexadecimal keyboard, we were set to program the 6502 using opcodes and raw data bytes. To solve the task, we had to design our programs using flow charts drawn on paper, and then translate the flowcharts to pseudo-code. With an idea of what the programming should look like, we sat down studying the manuals for the 6502 CPU internal structure, how it operated, and what it's view of memory and the world looked like. Next the manual for the Emma II was examined in detail, to learn how what we now knew about the CPU was used to implement a full single board computer.[1][2][3][4]
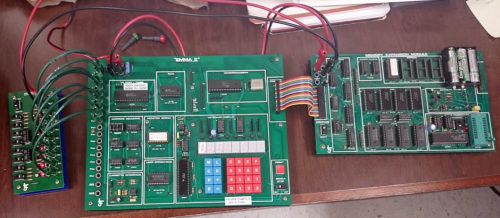
The 6502 trainer Emma II by LJ Electronics. CC BY-NC-SA Hans Otten (http://retro.hansotten.nl)
Armed with oodles of new information, our next task was to transform our flow-charts and pseudo-code into something Emma could understand. And that meant hand-translating our concept, first into Assembly mnemonics, and next to "hand-compile" our ASM-code into 6502 opcodes. The joy when our "traffic light simulator" finally worked! The frustration when our "lift controller" never worked... The satisfaction of coding up a lottery-number-picker of our own design, and having it work on the second try! Details such as zero-page, indirect and immediate addressing and the importance of understand addressing modes are still (if somewhat ratteling) stuck in my head 🙂 And I will easily claim that the experience of having to opcode-program a computer system has given a solid foundation for my later work and understanding in the field of information tech.
Even if we (naturally) were using more modern and advanced computer systems for our day-to-day tasks, and the Internet was about to explode (actually, my 2nd-year project in spring of 1995 was internet-enabling the school), the raw nature of the 8-bit computers fascinated me, and the simplicity of such a system had me thinking "This is something I can design and build from".
Alas, I had to leave Emma at school. But a short time later, I came in possession of two 6502 CPU chips, an 8086, a weird thing named 80186, and also an even weirder named thing called a Zilog Z80. These parts rattled about in my parts bin, and my head for many long years. My hope, and intention, was to build a computer from at least one of these. A fairly simple 8 bit system, with RAM, ROM and some form of communication on a higher level than the sponge-like flaky keys of Emma was the whole "design".
I am happy and proud to tell that I have now completed that task! In a series of articles, I will tell about the 2-year journey that lead to a fully functioning 8-bit computer, not at all built on the 6502 🙂
VPN setup on Cisco IOS that works nice with Windows 7 and Linux w/ NetworkManager
I have a Cisco 2691 router running IOS 12.4 series at home currently, and I've been planning to cook up a VPN setup on it that allows me to connect back home, and also to "trombone" my way back out from home. I wanted toe setup to be as short and simple as possible, but still include encrypted communication. Finally, I wanted this to be available using "standard setup" client software on my XUbuntu+NetworkManager laptop, as well as Windows 7.
The "kicker" that made me finally cook this up, was the need to easily demonstrate to a colleague as well as a few students a simple way to do road warrior VPN using a Cisco IOS router as the termination point.
My setup uses Microsoft PPP Extensions to get encrypted communication, and as such it is a form of PPTP VPN.
The important bits to understand this setup is:
- I use the IPv4 range 10.0.5.0/24 (or rather a subset of it) for the VPN clients.
- VPN clients connect to my "Internet" facing address, located on FastEthernet0/0
- All my internal networks, including VPN clients, use NAT with overload (PAT) for IPv4 communication with "the world"
I suppose it should be possible to use a Mac as a client for this setup too, but to be honest, I can't be bothered to check 🙂
aaa authentication ppp VPDN_AUTH local

!

ip name-server 10.0.2.2

!

vpdn enable

!

vpdn-group RoadWarrior

! Default PPTP VPDN group

 accept-dialin

 protocol pptp

 virtual-template 1

!

username vpntest privilege 7 password 7 053D1601114D5D1A0E550516

!

interface FastEthernet0/0

 description Internet

 ip nat outside

 !...

!

interface Virtual-Template1

 ip unnumbered FastEthernet0/0

 ip nat inside

 peer default ip address pool VPNPool

 no keepalive

 ppp encrypt mppe auto

 ppp authentication ms-chap-v2 VPDN_AUTH

!

ip local pool VPNPool 10.0.5.2 10.0.5.31

!

ip nat inside source list NAT interface FastEthernet0/0 overload

!

ip access-list standard NAT

 permit 10.0.5.0 0.0.0.255
OpenCoreBot update #3: New frame removes flex, almost done
I'm almost done putting together the new frame for my printer, but stopped to upload a short video, as seen above. I'm amazed at how much flex I've lived with on the old frame, and already really believe that I'll be getting better results with the new frame. Before, I could flex the frame on the corners by a few centimeters(!), the we one simply does not move. This gun' be gud'!
Issues with different plastics when printing
When I started experimenting with 3D printing, I did a bit of research on the alternatives, and the requirements for the various plastics. From that search, I figured that ABS would require "care", while PLA would be simple to get started on. I didn't really know how I would build my printer, so I settled for printing in PLA.
Generally, I've had good success with printing in PLA. The thing I've generally struggled most on with PLA is getting good, even extrusion. I would frequently get jams, extruder "rollback" or uneven extrusions. When I got successful prints, they have generally been OK looking, and I've always had good print adhesion. From my third print I've always done PLA directly on a 60ºC heated glass bed.
OpenCoreBot update #2: I’m changing the build.
After my last post about the OCB project, I did a lot of building, and running the prototype. But I didn't post any updates during that time. The reason for that is that I really didn't have anything that I wanted to show. The initial buildup went fairly quick, I got decent speed out of the CoreXY mechanism, and I managed to print stuff. But I had some real issues that stopped me from saying "It works".
Please read on after "the jump" ...
GUI idea
I've used a wide range of GUI operating systems, and I'm not terribly fond of today's flat paper-style GUI's. And I keep thinking that we're a bit stuck on the window manager HCI that Bill &co invented in '95. I'm no graphics person, but tonight I started doodling on the window-manager decorations of something reminding me of the «Fischer Price» style of the late nineties. Maybe I'll expand on the idea? Maybe it'll end up with all the other unfinished ideas?
OpenCoreBot update: Aluminium extrusions and Parts!
I've settled on "OpenCoreBot" as my working title for my 3D printer (as mentioned in the previous post). The project plan started when I was looking for already existing 3D printer projects in the open-source/open-hardware realm based around aluminium extrusion. I was also looking for a design that did not use the "moving y" concept, simply because of the experiences from my DIY mini-CNC router. Using slotted square extrusions in mechanical buildup of CNC equipment has been close to a norm a long time. This kind of construction gives some important advantages, among them high flexibility and rigid constructions. What I did discover when looking at existing designs, was that there were a few open-hardware friendly designs based on the Mendel and Prusa designs, but other non-moving-y designs generally did not use open components other than printed and motion-control parts.
