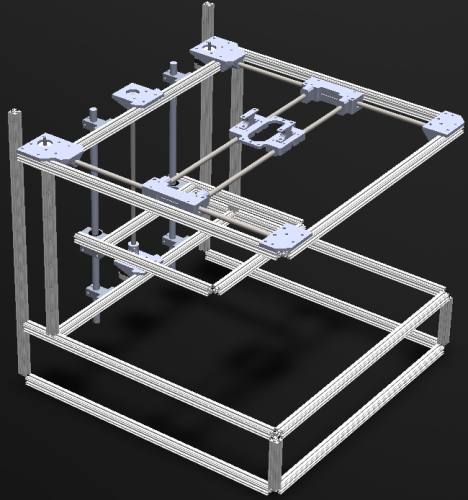
OpenCoreBot update #3: New frame removes flex, almost done
I'm almost done putting together the new frame for my printer, but stopped to upload a short video, as seen above. I'm amazed at how much flex I've lived with on the old frame, and already really believe that I'll be getting better results with the new frame. Before, I could flex the frame on the corners by a few centimeters(!), the we one simply does not move. This gun' be gud'!
Issues with different plastics when printing
When I started experimenting with 3D printing, I did a bit of research on the alternatives, and the requirements for the various plastics. From that search, I figured that ABS would require "care", while PLA would be simple to get started on. I didn't really know how I would build my printer, so I settled for printing in PLA.
Generally, I've had good success with printing in PLA. The thing I've generally struggled most on with PLA is getting good, even extrusion. I would frequently get jams, extruder "rollback" or uneven extrusions. When I got successful prints, they have generally been OK looking, and I've always had good print adhesion. From my third print I've always done PLA directly on a 60ºC heated glass bed.
OpenCoreBot update #2: I’m changing the build.
After my last post about the OCB project, I did a lot of building, and running the prototype. But I didn't post any updates during that time. The reason for that is that I really didn't have anything that I wanted to show. The initial buildup went fairly quick, I got decent speed out of the CoreXY mechanism, and I managed to print stuff. But I had some real issues that stopped me from saying "It works".
Please read on after "the jump" ...
OpenCoreBot update: Aluminium extrusions and Parts!
I've settled on "OpenCoreBot" as my working title for my 3D printer (as mentioned in the previous post). The project plan started when I was looking for already existing 3D printer projects in the open-source/open-hardware realm based around aluminium extrusion. I was also looking for a design that did not use the "moving y" concept, simply because of the experiences from my DIY mini-CNC router. Using slotted square extrusions in mechanical buildup of CNC equipment has been close to a norm a long time. This kind of construction gives some important advantages, among them high flexibility and rigid constructions. What I did discover when looking at existing designs, was that there were a few open-hardware friendly designs based on the Mendel and Prusa designs, but other non-moving-y designs generally did not use open components other than printed and motion-control parts.
What’s next, a teaser
I think I've arrived at a stage where I can show a bit of what I'm, working on, both as a teaser, and as a commitment for my self to make the teaser a reality ...
So, after several hours teaching myself Solidworks, I can show off the following image:
Working-name for the project: OpenCoreBot, or OCB. More details to follow when I'm closing on completion of the design.
CoreXY experimentation update #2: conventional revised belt path
After reviewing the naive errors in my thinking (see previous post), I've concluded that my idea for simplifying the belt path will not work. So, a revised prototype has been built, now using 3D-printed belt idlers on the loops, and only straight & symmetric lines on the essential parts of the belt path.
So, I'm no longer chasing the not-crossing belt path, instead going with a conventional, two-level CoreXY. There is now a crossing path on the belts, but the belts run on two separate levels, so there is no parts where the belt is forced to move in ways it's not designed to do.
Flaws in my simplified CoreXY idea
After building my first prototype of a CoreXY based cartesian movement system, as shown in two earlier posts ((CoreXY Experimentation))((CoreXY experimentation update)), I have realized that my idea for a simpler pulley configuration is flawed. I've simply forgot basic geometry math. The idea was to start with a CoreXY system, as described on http://corexy.com, take inspiration from FABtotum to avoid crossing belts, and simplify the pulley location to get as few anchor poins for the belts as possible. My attempt used two "layers" of belt paths, and tried to reduce the number of pulley-axles to 4, compared to CoreXY's 8 and FABtotum's 6. But, unless I start offsetting the location of stepper motors (and introducing uneven stress on the frame), I end up with an undesired geometry...
CoreXY experimentation update: pen plotting with motor moves
The prototype for my CoreXY experiment now moves by motor control. Using Marlin software on an Arduino Mega with RAMPS1.4 to drive the motors, I go through several speeds from 800mm/min to 24000mm/min, (that's 400mm/sec) moves. I have made no care to precision in the belt, and adding that to unevenly tightened belts, flex in components, and finally a pen that's not really fastened well, there is noticeable flaws in the resulting drawing. However, this also means the prototype highlights what areas of a final build will need extra attention.
Relevant links: http://corexy.com http://reprap.org/wiki/RAMPS_1.4 https://github.com/ErikZalm/Marlin
CoreXY experimentation
Based on the CoreXY concept and ideas from FABtotum to avoid crossing belts, I'm experimenting to see if I can get away with as few mounting-points for belts/pulleys as possible. This video shows that my prototype moves, as well as showing the CoreXY movements. Moving resistance feels very low, even if this is very simply built (no linear rollers/brass bearings, no attention made to precicion...). Next step: moving the parts using the motors 🙂
Ideas from: http://corexy.com/ http://www.fabtotum.com/ http://reprap.org/
OFNA/Hong Nor X1X-CR to X1X-CRE (Brushless conversion)
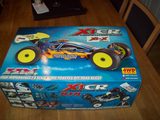
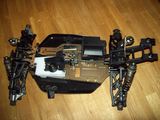
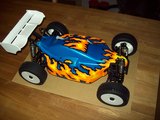
My first step into 1/8 scale offroad racing is a Hong Nor X1X-CR 1/8 buggy, arriving as a nitro car destined for conversion to brushless electric drive.
Electric has become a “standard” for my cars, and brushless my standard for offroad. So the buggy will be no worse that my other cars, and is given a brushless conversion. The -E extension of the model-name reflects my electrification 😛
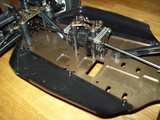
The X1X-CR is a factory-made options-upgrade of Hong Nor X1-CR RTR. The X1-CR RTR is a “parts-downgrade” of what Hong Nor calls X1-CR Pro, this kit is available under a more familiar name as OFNA Jammin X1-CR. The kit I am based on is a “80% RTR” kit, meaning no engine or electronics are included.So the start of brushless conversion was as simple as removing only a handful of parts.
